

For people living with arthritis, everyday tasks around the home can become more difficult when joints are painful, stiff, or less flexible.
Getting into the shower, standing from a chair, opening a door, reaching into a cupboard, or walking through a dim hallway may require more effort than it once did.
The good news is that making your home more arthritis-friendly does not necessarily mean undertaking a major renovation.
Many useful changes are inexpensive or free. Others, such as installing properly anchored grab bars or modifying a bathroom, require more planning but can make everyday activities easier and safer.
This guide walks through practical home modifications room by room, from simple organizational changes to larger accessibility improvements.
Quick Answer: How Do You Make a Home Arthritis-Friendly?
Start with the areas and tasks that cause you the most difficulty.
For many people, useful priorities include:
- Bathroom: Improve traction, consider grab bars and shower seating, and keep frequently used items within easy reach.
- Throughout the home: Improve lighting, remove trip hazards, and keep walking paths clear.
- Kitchen: Reorganize storage and reduce bending, reaching, gripping, and twisting.
- Bedroom: Make getting into and out of bed easier and improve nighttime lighting.
- Doors and hardware: Consider lever handles and easier-to-operate switches.
- Entryways and stairs: Improve lighting, handrails, traction, and visibility.
You do not have to modify your entire home at once. Start with the problem that affects your everyday life the most.
Why Home Modifications Matter for Arthritis
A home that requires excessive bending, reaching, gripping, twisting, or balancing can make everyday activities more difficult when arthritis affects your joints or mobility.
Small environmental changes can reduce some of these unnecessary demands.
For example:
- Moving frequently used kitchen items to an easier-to-reach shelf can reduce bending and stretching.
- Lever door handles can reduce the need to grip and twist.
- Better lighting can make nighttime movement easier.
- Shower seating can provide an alternative to standing for an entire shower.
- Properly installed grab bars can provide a stable handhold during transfers.
Home modifications are not a treatment for arthritis. Their purpose is to make your environment easier to use and, where appropriate, safer to navigate.
Where Should You Start?
If making changes throughout your home feels overwhelming, start by identifying the activities that cause the most trouble.
If slipping or falling is your biggest concern
Look first at:
- Bathroom floors
- Stairs
- Poorly lit hallways
- Loose rugs
- Cluttered walking paths
- Uneven thresholds
If getting up and sitting down is difficult
Look at:
- Chair and sofa height
- Toilet height
- Bed height
- Stable armrests
- Bed-assist equipment
- Shower seating
If hand arthritis makes everyday tasks difficult
Consider:
- Lever door handles
- Rocker-style light switches
- Large-handle utensils
- Jar openers
- Electric or automatic devices
- Smart-home controls
If bending and reaching are difficult
Consider:
- Reorganizing storage
- Pull-out shelves
- Lazy Susans
- Long-handled reachers
- Moving frequently used items to easier-to-reach locations
Room-by-Room Priority Guide
You do not need to remodel every room. Work through your home based on the tasks that are most difficult for you.
Bathroom Modifications for Arthritis
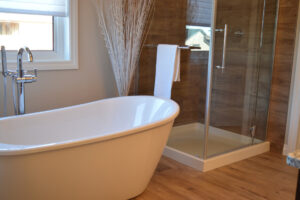
The bathroom is often a useful place to begin because it combines wet surfaces, transfers between sitting and standing, and tasks that may require reaching or gripping.
Improve Traction
Wet bathroom surfaces can become difficult to manage, particularly if joint stiffness or mobility limitations affect your balance.
Consider:
- A properly secured non-slip bath mat
- Appropriate traction inside the shower or tub
- A stable floor mat outside the tub or shower
- Keeping the floor clear of clutter
Avoid loose mats that slide, bunch, or curl at the edges.
Install Grab Bars Where Needed
Properly installed grab bars can provide a stable handhold when getting into or out of a shower, tub, or toilet area.
They should be securely attached to appropriate structural support. A towel bar should not be used as a substitute for a grab bar.
Consider Shower Seating
Standing throughout a shower can be tiring or uncomfortable for some people.
A shower chair or stool provides the option of sitting while bathing.
If stepping over a bathtub wall is the main difficulty, a transfer bench may be more appropriate because it allows the user to sit outside the tub and slide across.
Use a Handheld Showerhead
A handheld showerhead can make it easier to direct water where it is needed without repeatedly twisting, bending, or reaching.
It can be particularly useful when combined with shower seating.
Make Bathroom Storage Easier to Reach
Keep frequently used items such as:
- Soap
- Shampoo
- Towels
- Toothpaste
- Other toiletries
within a comfortable reach.
Pump dispensers may also be easier for some people than bottles that require squeezing.
Detailed Bathroom Guides
For more detailed product recommendations and buying guidance, see:
- Arthritis Tools for Safe Bathing and Showering — grab bars, shower chairs, transfer benches, and handheld showerheads
- Best Non-Slip Bath Mats for Arthritis — options for inside and outside the tub or shower
- Best Shower Seats for Arthritis — shower chairs, stools, and transfer benches
- Bathing Tips for Arthritis Relief — practical bathing techniques and routine tips
Lighting, Flooring, and Fall Hazards

The bathroom is not the only area that deserves attention.
Hallways, bedrooms, stairs, entrances, and other walking areas can become harder to navigate when lighting is poor or the floor contains obstacles.
Improve Lighting
Good lighting can make it easier to see steps, thresholds, furniture, and other potential obstacles.
Useful options include:
- Motion-sensor night lights: Useful in hallways, bedrooms, and bathrooms.
- Brighter lighting: Consider better illumination around stairs and entryways.
- Bedside lighting: A touch lamp or accessible switch can be easier to operate than a small toggle switch.
Reduce Flooring Hazards
Look for:
- Loose throw rugs
- Curling rug edges
- Uneven transitions between flooring surfaces
- Raised thresholds
- Electrical cords crossing walking paths
- Clutter around commonly used routes
Secure rugs properly or remove them when they create a hazard.
Keep the path between the bedroom and bathroom clear, especially if nighttime trips are common.
Kitchen Modifications for Arthritis

Kitchen tasks can involve repetitive gripping, twisting, lifting, reaching, and standing.
The goal is to reduce unnecessary effort rather than replace every kitchen item with an adaptive product.
Reorganize Storage
Move frequently used dishes, cups, utensils, and cookware to locations that are easy to reach.
Whenever practical, keep everyday items between approximately waist and shoulder height.
Less frequently used items can be stored in harder-to-reach locations.
Use Pull-Out Shelves and Lazy Susans
Pull-out shelves can bring the contents of lower cabinets toward you rather than requiring you to reach deep inside.
Lazy Susans can make corner cabinets easier to access.
These modifications can be particularly useful when reaching or bending is difficult.
Add Counter Seating
A sturdy kitchen stool or suitable counter-height chair can allow you to sit while preparing food.
Make sure the seating is stable and appropriate for the counter height.
Choose Easier-to-Use Kitchen Hardware
Lever-style faucets can reduce the need for twisting a small handle.
Adaptive kitchen tools can also help with specific tasks such as:
- Opening jars
- Gripping utensils
- Cutting food
- Opening cans
- Measuring ingredients
For more recommendations, see our guide to Best Kitchen Tools for Arthritis Hands.
Bedroom Modifications for Arthritis
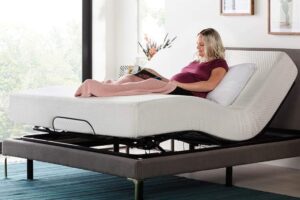
Getting into and out of bed can become particularly difficult when stiffness is worse in the morning.
The bedroom should make these transitions as straightforward as possible.
Adjust Bed Height
Bed height affects how much bending is required when sitting down or standing up.
If your bed is unusually low, bed risers may provide one possible solution.
However, avoid raising a bed to a height that makes getting onto it difficult or unstable.
The appropriate height depends on the individual and the bed design.
Consider a Bed-Assist Rail
A properly designed bed-assist rail can provide a stable handhold when getting up or repositioning in bed.
Read our guide to Bed Assist Rails: An Aid for Safer Bed Transfers for more information.
Choose equipment appropriate for the bed and follow the manufacturer’s installation and safety instructions.
Make Dressing Easier
A sturdy chair or bench can allow you to sit while putting on clothing.
Dressing aids such as:
- Long-handled shoehorns
- Button hooks
- Dressing sticks
- Sock aids
can reduce the need for bending or difficult hand movements.
Improve Nighttime Lighting
Motion-sensor night lights can illuminate the route between your bed and bathroom without requiring you to find a switch in the dark.
Keep the walking path clear of shoes, cords, baskets, and other objects.
Doors, Handles, and Smart-Home Controls
Small hardware changes can make a surprisingly large difference because doors and switches are used repeatedly every day.
Replace Difficult Round Door Knobs
Round knobs generally require a combination of gripping and twisting.
Lever handles can usually be operated with a downward push using the hand, palm, wrist, or forearm.
For renters, removable lever-handle adapters may be an option where appropriate.
Consider Rocker Light Switches
Wide rocker switches may be easier to operate than small traditional toggle switches because they can be pressed with a flatter part of the hand.
Use Smart-Home Controls Where Helpful
Smart technology can reduce the need to physically operate certain controls.
Examples include:
- Smart plugs: Control lamps and some appliances without reaching for a switch.
- Voice assistants: Operate compatible lights and devices using voice commands.
- Smart locks: Keypad or app-controlled locks can reduce the need to grip and turn a traditional key.
See our guide to Smart Home Gadgets for Arthritis: Reduce Strain & Stay Independent for more ideas.
Entryways, Thresholds, and Stairs
Entryways and stairs can create challenges because they combine changes in elevation, thresholds, weather, lighting, and the need to carry items.
Improve Stair Safety
Consider:
- Secure handrails
- Good lighting
- Clear steps
- Appropriate non-slip surfaces
- High-contrast markings where visibility is an issue
A second handrail may provide additional support for some people.
Make Thresholds Easier to Navigate
Raised thresholds and uneven transitions can catch a toe or shoe.
Where appropriate, a low-profile or beveled transition can create a smoother change between flooring surfaces.
Choose Stable Entry Mats
Use mats that lie flat and have secure backing.
Avoid mats with curled or raised edges that can catch footwear.
Modifying a Home for a Parent or Loved One
If you are making changes for a parent, spouse, or other loved one, involve them in the process whenever possible.
A modification that looks useful to someone else may not address the person’s actual difficulty.
Instead, observe everyday activities such as:
- Getting up from a chair
- Moving through the bathroom
- Getting into and out of bed
- Preparing food
- Opening doors
- Using stairs
These activities can reveal problems that are easy to miss during a simple room-by-room inspection.
Our Home Accessibility Mini-Assessment can also help you work through common areas of the home together.
Planning for Changing Needs
Your needs may change over time.
If you are already remodeling, consider whether a modification could remain useful if mobility becomes more limited in the future.
For example, a bathroom renovation might consider:
- A lower-threshold or curbless shower
- Appropriate space for movement
- Reinforced walls for future grab bars
- A handheld showerhead
- Good lighting
Planning ahead can sometimes avoid having to redo the same area later.
Do You Need a Home Modification or an Adaptive Tool?
Sometimes the best solution is to change the environment. Other times, a small adaptive tool is enough.
| Problem | Possible home modification | Possible adaptive tool |
|---|---|---|
| Difficult to open doors | Lever handle | Door-opening aid |
| Trouble reaching items | Reorganize storage | Reacher |
| Difficulty opening jars | Easier storage | Jar opener |
| Trouble getting from toilet | Grab bar | Toilet safety frame |
| Difficulty standing from a chair | Appropriate furniture height | Lift-assist device |
| Trouble bathing while standing | Shower modification | Shower seat |
| Difficulty gripping utensils | Accessible kitchen hardware | Adaptive utensils |
A useful rule is to modify the environment when the same problem occurs repeatedly in the same location, and consider an adaptive tool when you need help with a particular task.
Renter-Friendly Arthritis Modifications
You do not have to own your home to make useful changes.
Renter-friendly possibilities include:
- Motion-sensor lights
- Reorganizing storage
- Non-slip solutions that do not damage flooring
- Reachers
- Adaptive kitchen tools
- Removable lever-handle adapters
- Freestanding shower seating where appropriate
- Rearranging furniture to create clearer walking paths
For drilling, permanent hardware, or structural changes, check your rental agreement and obtain permission when necessary.
Financial Resources and Assistance
Larger home modifications can become expensive, but assistance may be available depending on where you live and your circumstances.
Possible resources include:
- Area Agencies on Aging: In the U.S., local agencies may know about home-safety and accessibility programs.
- Veterans programs: Eligible veterans may qualify for certain housing adaptation benefits.
- Medicare Advantage: Some plans may offer supplemental benefits related to home safety or assistive equipment.
- Local nonprofits: Community organizations may provide home repairs or accessibility assistance.
Programs and eligibility change, so check directly with the relevant organization or plan before assuming a modification will be covered.
Working With an Occupational Therapist
An occupational therapist can evaluate how you perform everyday activities and recommend changes based on your individual needs.
This can be particularly useful when you are unsure whether you need:
- A home modification
- An adaptive tool
- A different way of performing a task
- A combination of solutions
An OT may assess activities such as bathing, dressing, cooking, using stairs, getting into bed, or moving around the home.
If arthritis is making everyday activities difficult or unsafe, ask your healthcare provider whether an occupational therapy assessment would be appropriate.
Simple Arthritis Home Modification Checklist
Walk through your home and ask the following questions.
Bathroom
- Can I safely get into and out of the shower or tub?
- Are the floor surfaces secure?
- Do I need a stable place to sit?
- Can I reach toiletries without excessive bending or stretching?
- Would a properly installed grab bar help?
Kitchen
- Are frequently used items easy to reach?
- Do I have to twist or squeeze difficult handles?
- Would pull-out storage help?
- Could I sit for some kitchen tasks?
Bedroom
- Is getting into or out of bed difficult?
- Can I reach nighttime essentials easily?
- Is the route to the bathroom clear and well lit?
Living Areas
- Are chairs and sofas easy to stand from?
- Are walking paths clear?
- Are cords, rugs, or furniture creating obstacles?
Entryways and Stairs
- Are stairs adequately lit?
- Are handrails secure?
- Are mats stable?
- Are thresholds easy to navigate?
- Is there somewhere stable to sit while putting on footwear?
Frequently Asked Questions
What are the best home modifications for people with arthritis?
The best modifications depend on the tasks that are difficult for you. Common priorities include improving bathroom safety, making doors easier to operate, reducing bending and reaching, improving lighting, and making seating and beds easier to use.
What is the easiest home modification for arthritis?
Some of the easiest changes cost little or nothing. Reorganizing frequently used items, improving lighting, removing clutter, and creating clearer walking paths can make everyday activities easier without remodeling.
Are grab bars useful for arthritis?
Grab bars can provide a stable handhold when getting into or out of a shower, tub, or toilet area. They need to be properly installed and positioned for the person using them.
How can I make my kitchen more arthritis-friendly?
Keep frequently used items within easy reach, reduce unnecessary twisting and gripping, consider pull-out storage, and use adaptive tools when a particular kitchen task is difficult.
How can I make a bathroom safer with arthritis?
Improve traction, remove loose mats, consider properly installed grab bars, use a shower seat if appropriate, improve lighting, and keep frequently used items within easy reach.
Should I remodel my entire home for arthritis?
Usually not. Start with the areas and tasks causing the most difficulty. Small changes can often solve a specific problem without requiring major remodeling.
Can an occupational therapist help with home modifications?
Yes. An occupational therapist can evaluate everyday activities and recommend practical changes or equipment based on your abilities and home environment.
Building an Arthritis-Friendly Home Over Time
Creating an arthritis-friendly home is an ongoing process.
You do not need to complete every modification immediately. Start by identifying the everyday activities that require the most effort or create the most concern.
Then make one practical change at a time.
A safer, easier-to-use home may come from something as simple as moving a frequently used item to a better shelf, replacing a difficult door knob, improving a dark hallway, or adding appropriate support in the bathroom.
Free Home Safety Resources
Use our practical resources to continue assessing your home:
Related Reading
- Fall Prevention for Arthritis: Strategies for Safety & Independence
- Smart Home Gadgets for Arthritis: Reduce Strain & Stay Independent
- Best Mobility Aids for Arthritis: Safe, Independent Movement
- Bed Assist Rails: An Aid for Safer Bed Transfers
Medical Disclaimer: This article is for informational purposes only and does not constitute medical advice. Always consult your doctor, rheumatologist, or occupational therapist before making changes to how you manage your arthritis.
